back
DIY AccuForce steering clamp
 |
When I ordered the AccuForce DIY wheelbase,
Ascher Racing listed a $27 steering wheel adapter
for the non-standard 14mm AccuForce shaft.
When it became clear that AccuForce was overwhelming
my 14mm flange, Ascher's adapter was no longer listed.
FWIW, Ascher currently has no products available...
14mm turns out to be a non-standard motor shaft diameter,
and other motor shafts use keyways instead of set screws.
Neither SimXperience nor Ricmotech sell their hub separately.
The AccuForce motor has about 2.2 inches of exposed shaft,
leaving about an inch after mounting thru a 5/4 deck plank.
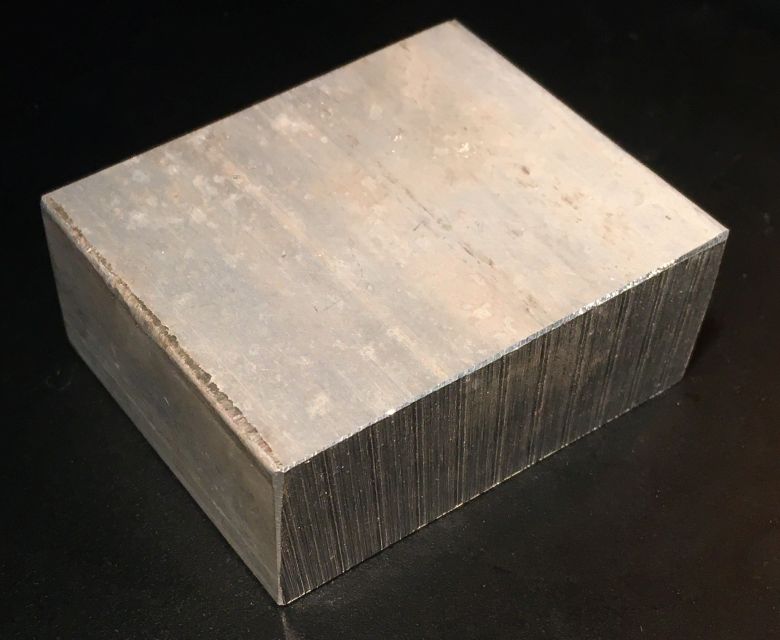
An eBay seller offered 1x2.5-inch aluminum by the inch,
so I ordered 2 inches.
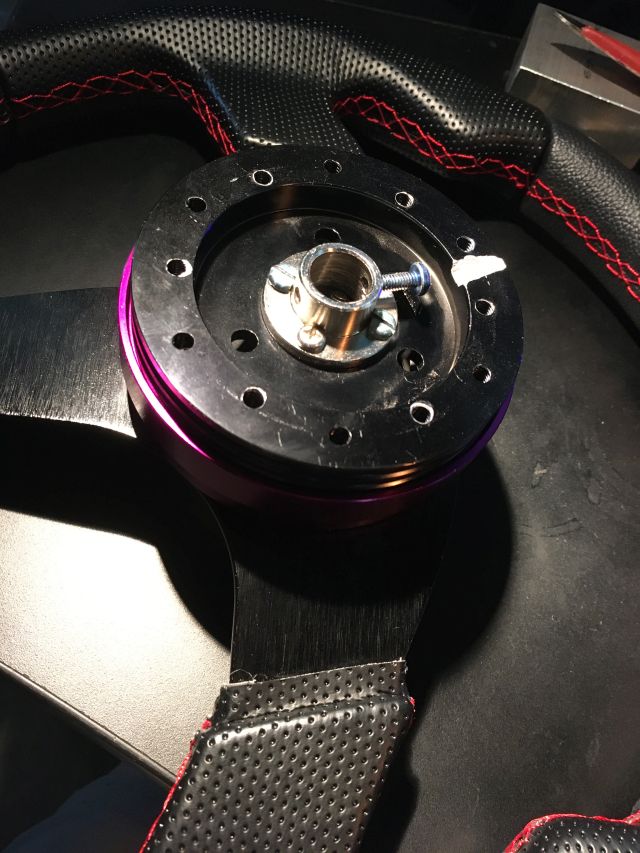
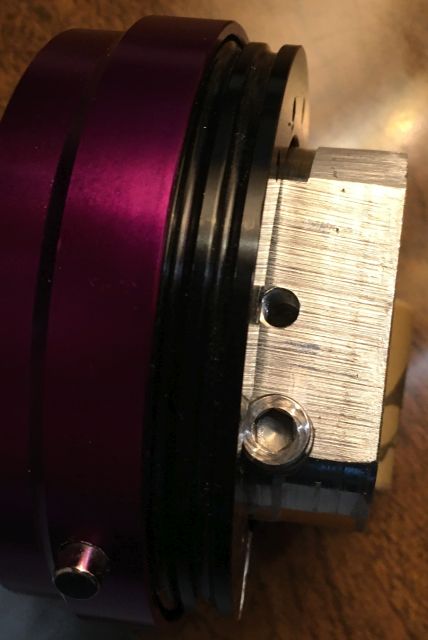
The steering wheel adapter recess inside diameter is 2.45";
2.5" hole saws on hand can cut a 1x2x2.5 inch block to fit,
but aluminum cutting oil is wanted to avoid overheating, etc.
|
Ordered cutting oil and a 14mm drill bit, 3 mounting holes and a set screw hole must be drilled and tapped;
A slot wants cutting so that this collar can be clamped tightly to the shaft, taking stress off the set screw
but also requiring another hole drilled and tapped for a clamp bolt.
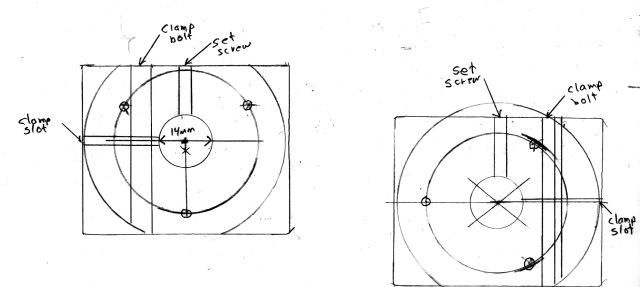
Orientation of the 3 hub adapter mounting screw threaded holes was a consideration;
the right-hand option was selected because it moved the clamp bolt location away from the center bore,
so applying more clamping leverage.
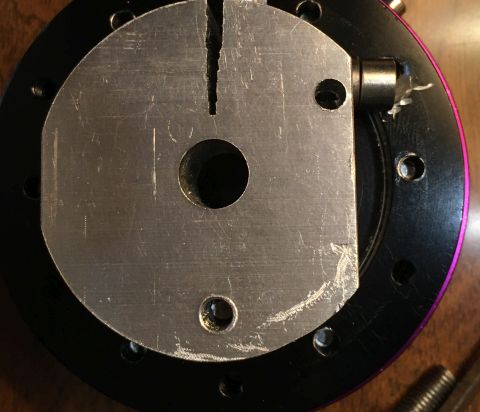
The collar is so stiff that tightening that clamp bolt does not visibly close the slot.
procedure
1x2x2.5" aluminum block
pilot holes
hole saw
test fit #1
drill & tap
final assembly
1x2x2.5 aluminum block received
|
Transferred hole centers from drawing
and center-punched.
|
pilot holes
|
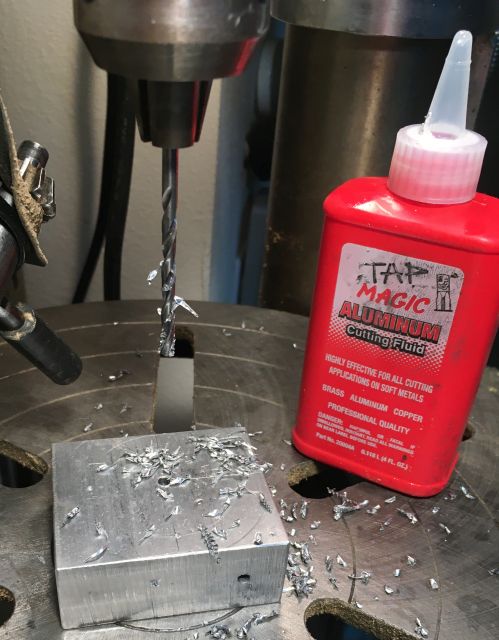
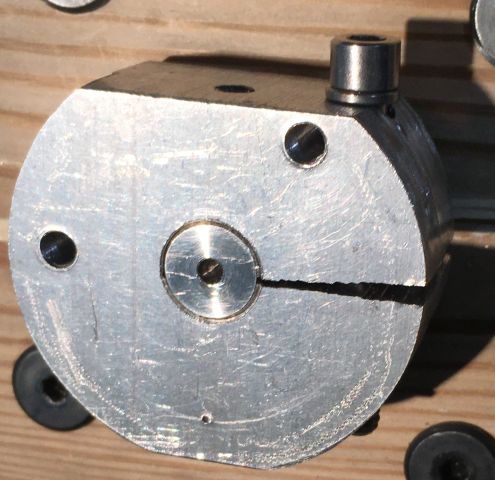
1/8" holes were drilled at center punch locations for
14mm bore, clamp bolt and 2 of 3 hub adapter holes.
A third adapter hole gets drilled after clamping.
The cutting fluid is messy to apply;
it wicks along the dispensing nozzle and dissolves print.
Drill the future 14mm bore to 1/4" for the hole saw pilot.
|
|
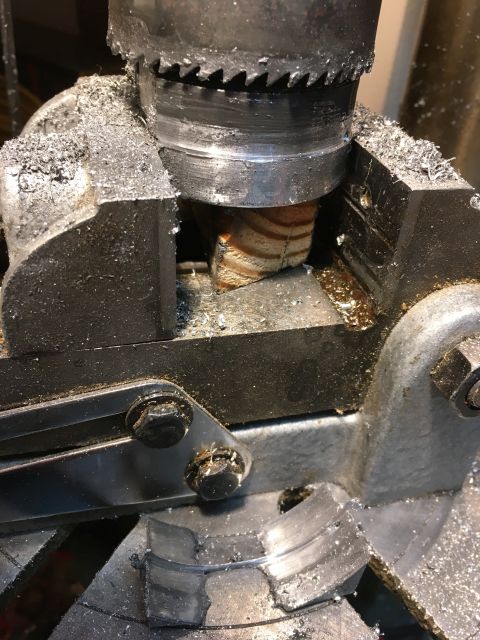
hole saw
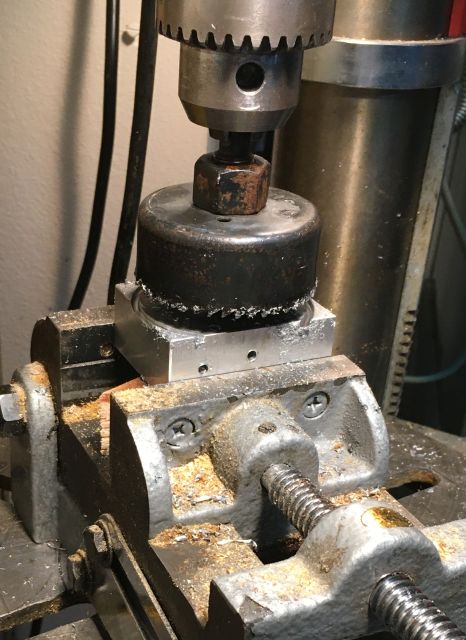
|
Hole saw flings chips and cutting fluid;
wear an expendible shirt.
Heat is the enemy of cutting edges;
bring the saw only briefly in contact with aluminum
to generate a few chips, then back off. While tedious,
saw teeth nominally intended for wood were still fairly sharp
at the end. The aluminum gets hot and expands enough
to seize the saw blade if not allowed to cool.
Cutting was done in 4 sessions and from both sides.
|
|
|
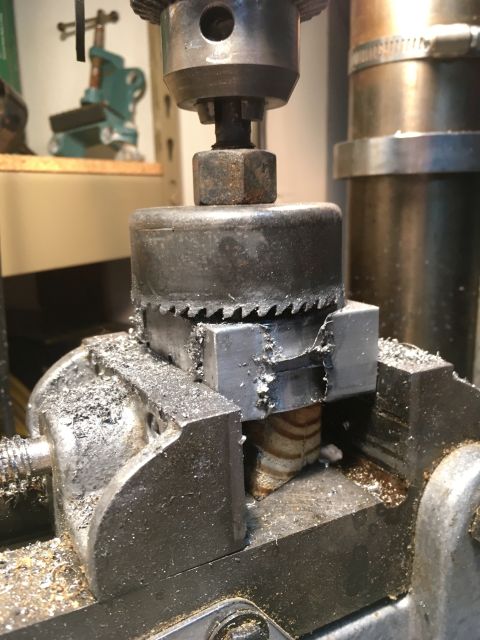
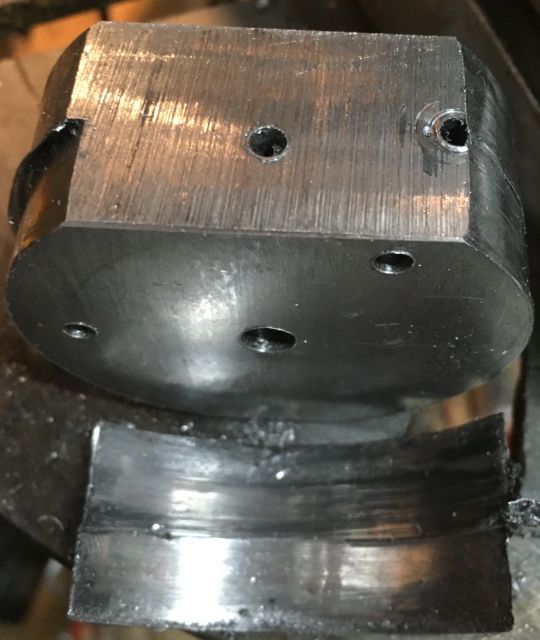
Because sawn from both sides
with less than ideal equipment and technique,
cuts in some places mismatched by 1/8" or so.
That was addressed somewhat using a belt sander.
Clamp bolt pilot hole is at the edge of the flat;
it should have been bored out to threading diameter
before hole sawing.
Note wood block beneath aluminum block to more or less
locate it squarely above vise > 1/2"
to avoid hole saw collision with jaws.
|
|
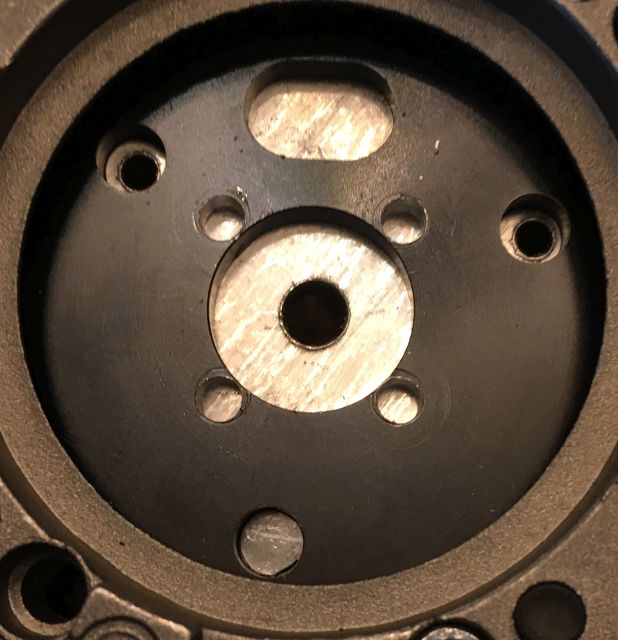
test fit #1
|
The two hub adapter pilot holes align nicely;
2-1/2" hole saw cut aluminum about 4mm too small
for a tight fit in hub adapter recess.
|
|
drill & tap
Found a socket head 1/4-20 bolt suitable for clamping;
drilled 1/8" pilot hole out to 13/64",
but 1/4-20 tap was too dull to cut threads
even with generous cutting oil application.
1/4" is also a good set screw size;
ordered with a tap...
Ascher Racing's (NLA) adapter was cheaper:
Parts and consumables
$6.35 1x2x2.5" 6061 Al chunk
$8.50 Tap Magic 20004A
$3.91 1/4-20 tap
$5.30 1/4-20 x 3/4 set screws
$5.34 14mm drill bit
$8.19 70mm OC 6 hole steering hub adapter
--------
$37.59
$16.04 quick releaseĀ
|
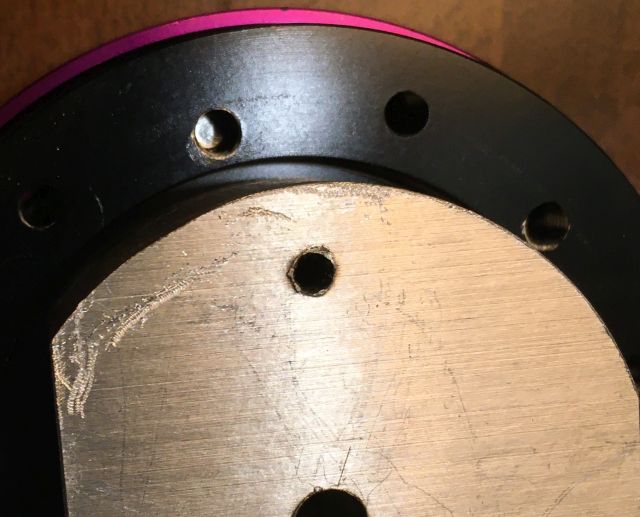
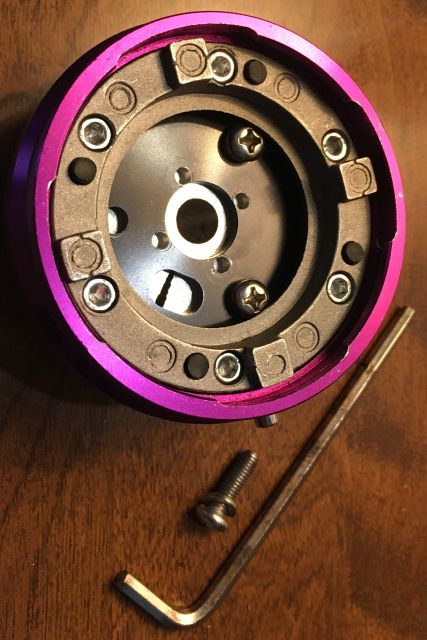
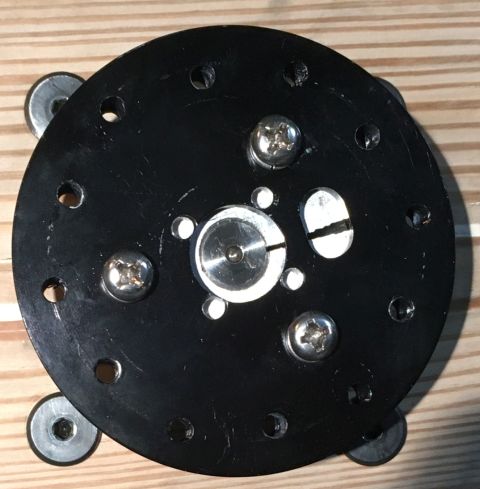
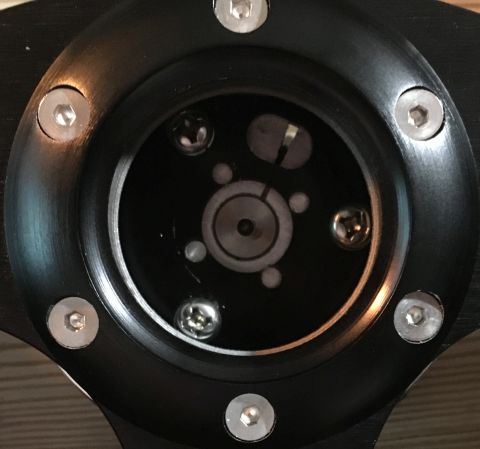
Clamp bolt head clearance was cut in the hub adapter:
While waiting, bored 1/2" center hole
and slotted clamp far enough to cut threads
in the bolt hole beyond the slot.
|
Third mount screw hole will be drilled and tapped
after center is located while clamped to motor shaft.
|
Set screw and clamp bolt hex keys will clear
while assembled to hub adapter and quick release.
|
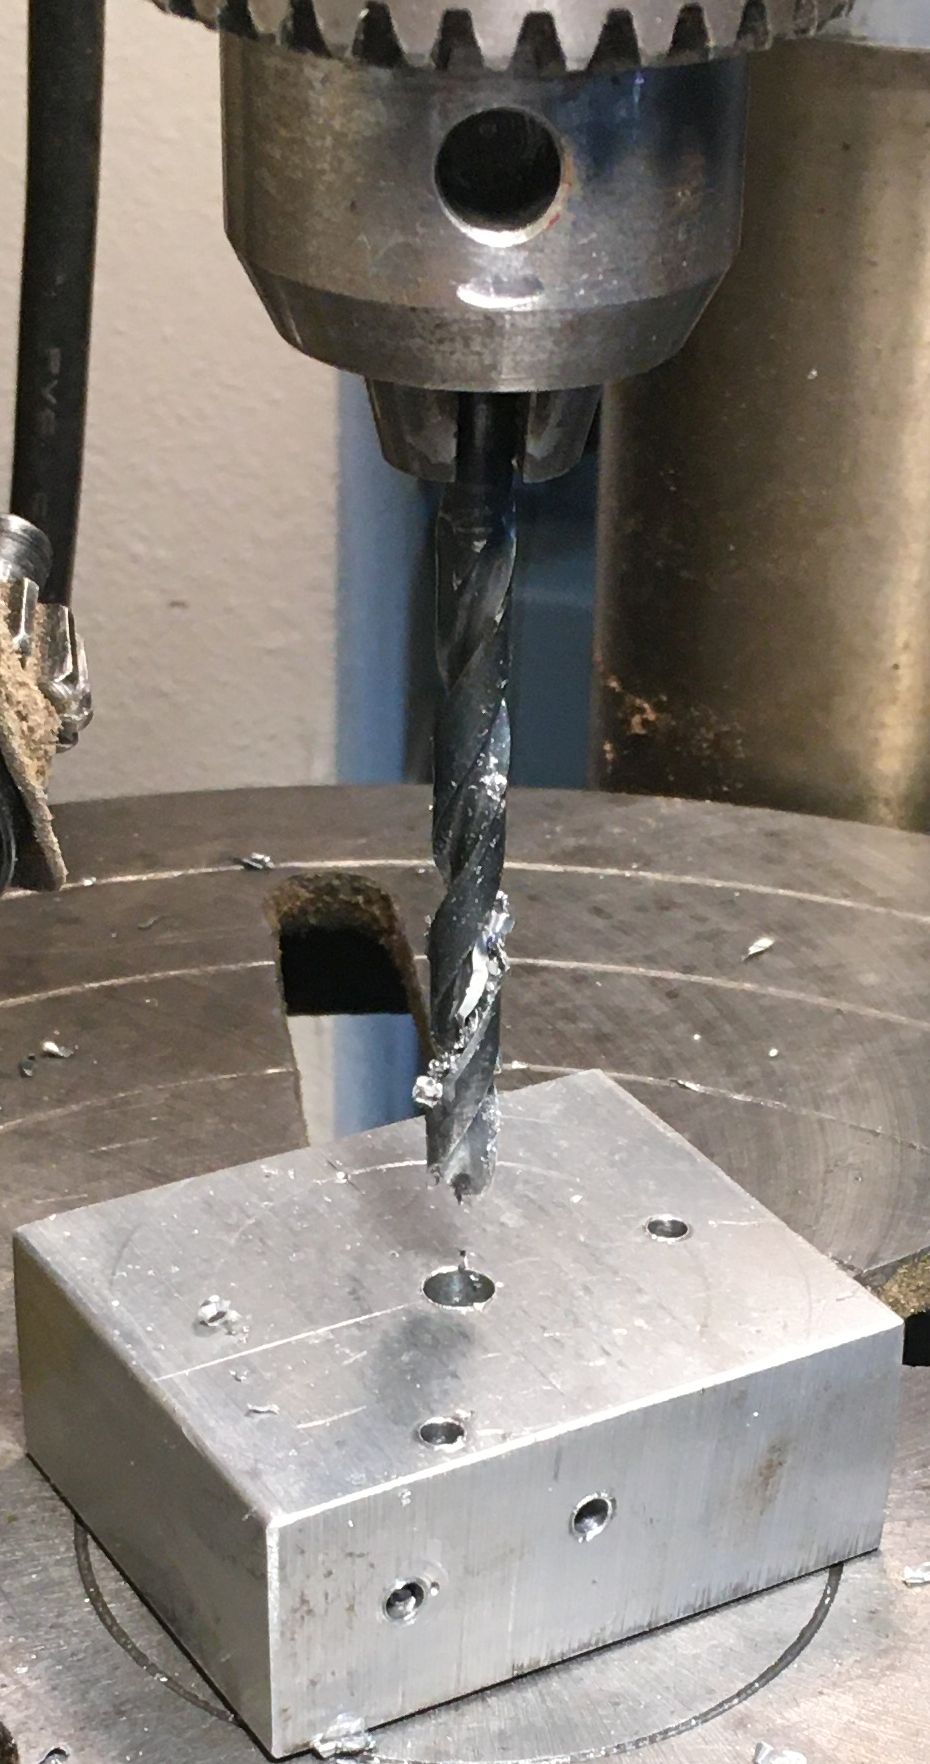
14mm drill bit chattered at first, despite cutting oil.
Clamped and ready to locate third hub screw hole.
|
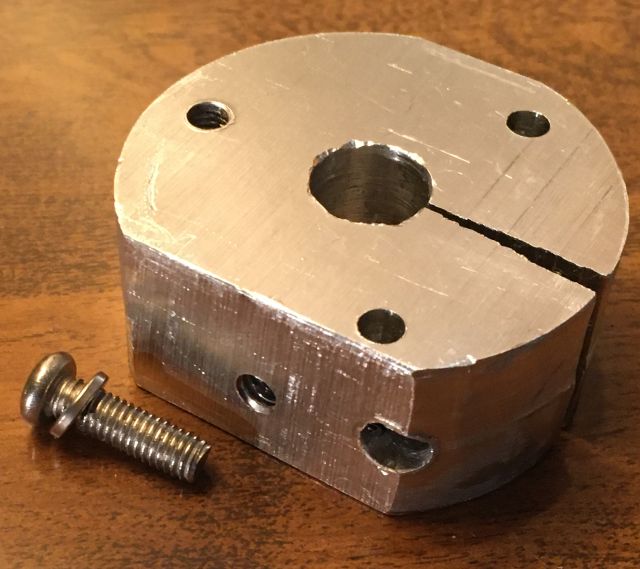
All holes drilled & tapped; ready for assembly.
14mm hole slightly too tight for motor shaft;
slowly enlarged by scraping with a blade.
Removal requires a (car battery clamp) puller.
|
final assembly
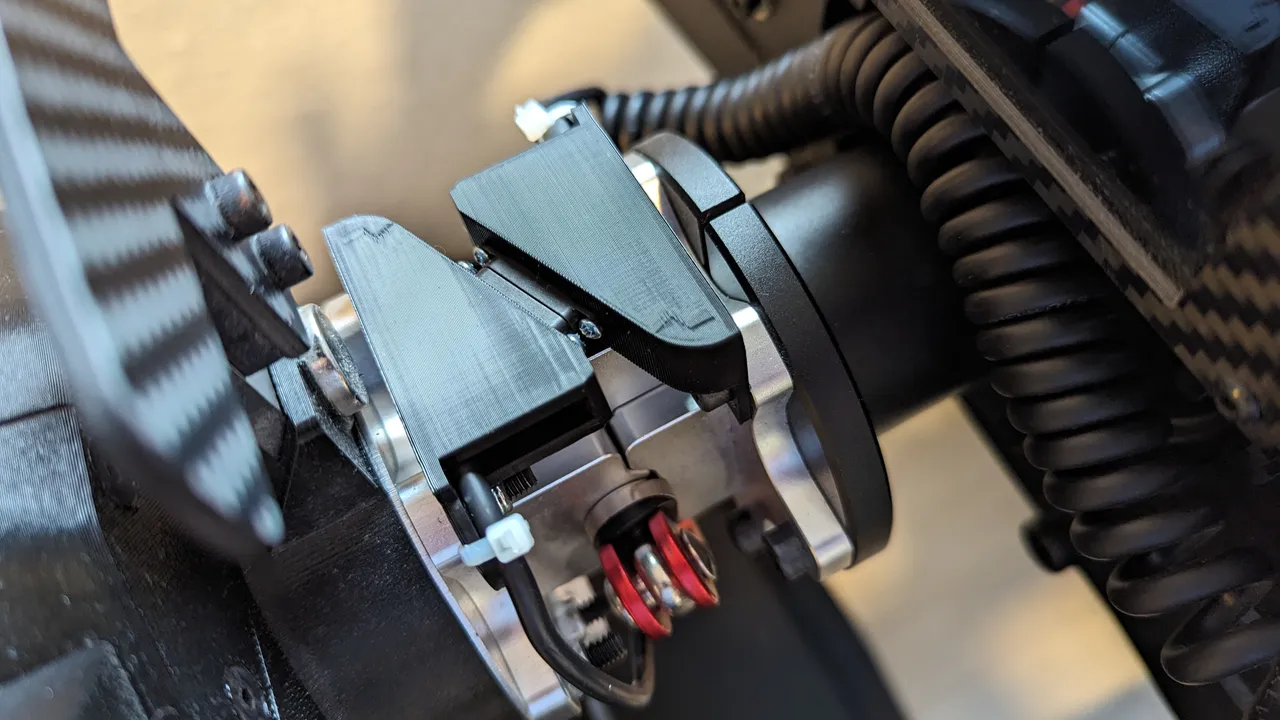
Set-screwed to shaft; hub adapter mounted.
|
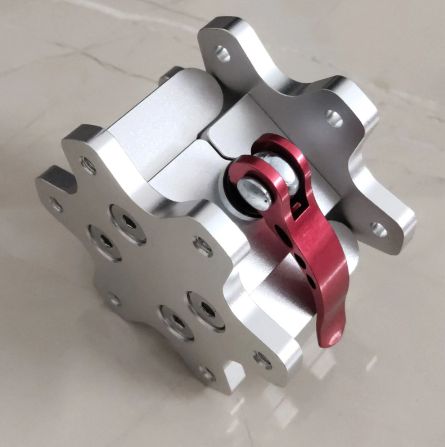
Completely solid hub clamp exposed quick release slop;
swapping for another quick release cured that temporarily.
|
That quick release design depends on small elastomer buttons to take up slack,
but those eventually compress, resulting in bayonet clamp ring going from too tight to too loose.
Better results with AliExpress Q1r "clones":
|