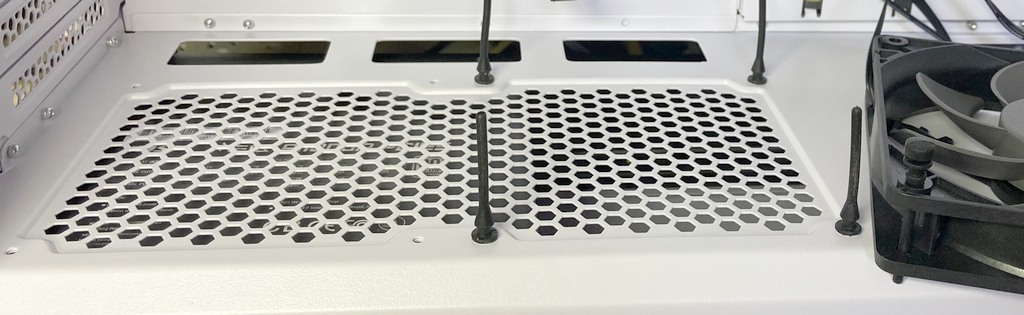
Most DP502 case holes for fans are slots; pulling mounts into fan, then wriggling buttons into case slots is easier than vice versa.
An exception: Antec provided threaded holes to mount reverse fan over PSU chamber;
these need drilling out to 6mm for silicone isolaters, which are still hard to install before
installing reverse fan on isolators.
Installing isolators in that fan first would be doomed.
Silicone buttons securing isolators to case protrude about 5mm, impacting engagement of magnetic strips on screens.
While OK for the top screen, which also has gravity working for it,
the front screen wants more space between magnetic strips and screen, provided here by foam tape:
Arctic 3-wire fans are plugged into Antec's combination fan and LED controller,
which controls speed for up to 6 DC fans from a single PWM (4-wire) motherboard fan control.
The Ai1000P supply fan intake is on its nominal top, requiring inverted installation in DP502 case
to avoid drawing heated internal air through it.
Label wording incorrectly implies a user switch for selecting 110 vs 220 VAC power.
Connecting a provided cable from G.I. port to USB enables monitoring and control by MSI Center.
10 Aug 2023
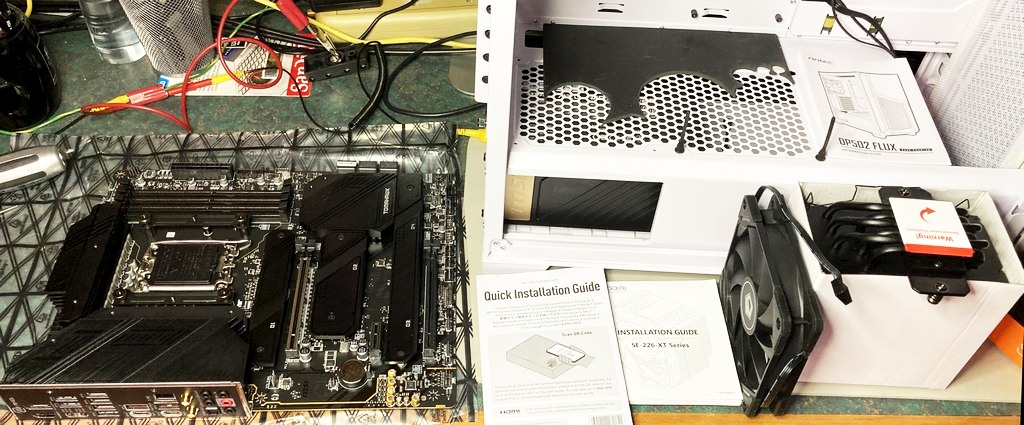
Unlike the first, this motherboard's bag was sealed and CPU socket pristine.
Unlike the first CPU, this motherboard is exactly the model ordered.
Sadly, the Galax RTX 4090 graphics card blocks its only 1x PCIe card slot.
While CPU installation is delicate, motherboard installation on case standoffs is IMO trickier;
standoffs can damage circuit traces on the board's backside.
Luckily, a scrap of 3mm black neoprene sheet lifts the motherboard,
vertically aligning its mounting holes with corresponding case standoffs,
and IO bracket laterally aligns the motherboard.
To reduce risks:
first, ensure that standoffs are fully tightened in case threads
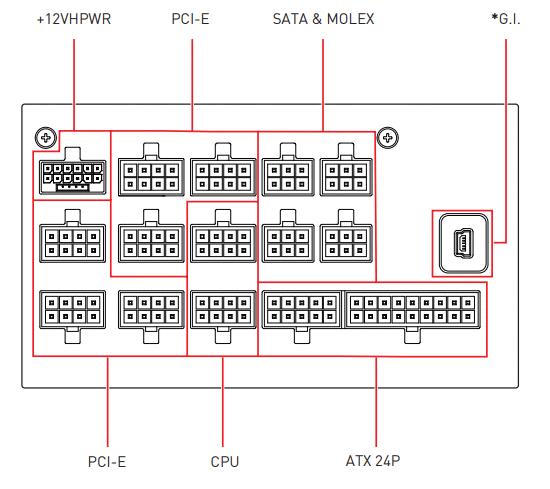
Plug cables into power supply before installing it in chassis:
*G.I. to USB
12vhpwr cable for RTX 4090
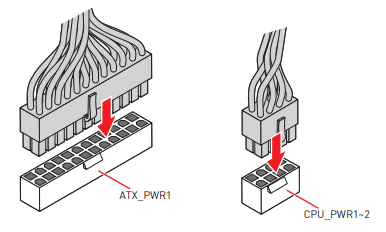
24-pin ATX, 2x CPU to 8-pin +12V motherboard:
Plugging the MSI ATX power connector into the MSI motherboard
was pathologically difficult. Cables plug nicely into Ai100P;
MSI obviously never tested them with their motherboards.
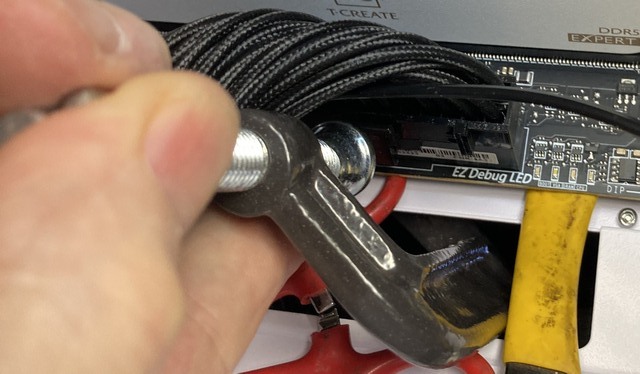
Without bracing behind its connector,
C-clamp force would likely have damaged the board.
Plug power cables to motherboard
before installing it in chassis.
SATA to Optical drive, Fan controller
11 unused power cables:
mini USB to type A - will replace mini USB to JUSB1 after testing
6x PCI-E
2x SATA
Molex
12VHPWR to 2x PCI-E
Fans
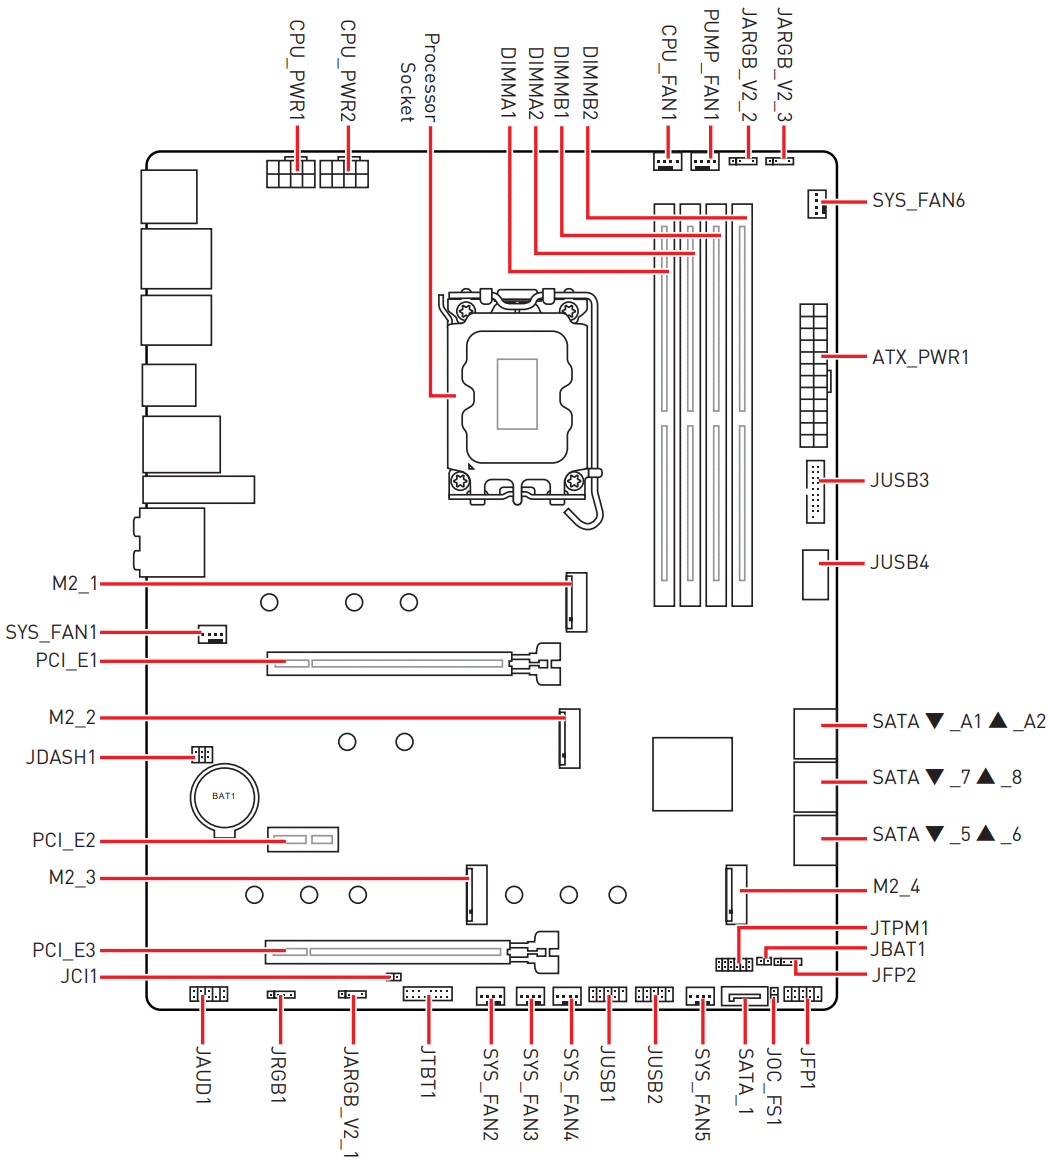
CPU_FAN1: PWM cooler
SYS_FAN1: DC rear Antec
SYS_FAN4: DC chamber Antec
SYS_FAN6: PWM controller
Signals
Front Panel:
JARGB_V2_3: front cover LEDs
JAUD1: front panel audio
JUSB1,2: USB2 bracket
SATA_A1: Optical drive
JUSB3: USB3 front panel
JUSB4: USB-C bracket
Complete except for GPU, chamber fan, USB brackets - to be installed after initial testing